 Isolate Member by Number
- Step-By-Step
- Tips and Tricks
- Related Tools
1 . Click the Isolate Member by Number icon, which is pictured above. The icon can be found on the Drawings page > Members section.
Alternative: Invoke Isolate Member by Number using the Find Tool by searching the command name and clicking the icon, which is pictured above.
Learn more about alternative methods for launching commands.
2 . A selection dialog opens. On it is a selection list of all member numbers that have been assigned to members. Double-click the number of the member you want to isolate.
Alternative: Press the Cancel button to end the operation and stay in your current view of the 3D model.
Note: An alert window appears if the member is not visible in the current view. Click the OK button to proceed.
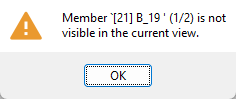
(1/2) means B_19 is 1 of 2 members with the same piecemark.
3 . The member is isolated from all others in the model and the Isolate Member tool window opens.

4 . When you are done with Member Isolation, click the OK button on the Isolate Member Tool window.
- Member isolation (result of using this tool)
- Member isolation solid display type (User and Site Options > Modeling)
- Status Display (selection list tool)
- Hide... and Show All (selection list tool)
- Isolate Member by Location (alternative)
- Isolate Member by Piecemark (alternative)
- Hide Selected (alternative )
- Hide Unselected (alternative )

